Facebook Events: Why do they matter to your nonprofit?
At CDS we’re somewhat contrary when it comes to events as fundraisers because of the time and energy they can take to organize. However, they’re great friend-raisers and serve as a platform for you to build awareness in the community you serve beyond your core supporters.
Odds are, your organization already hosts several events a year. Maybe most are annual events, and you’re not worried about attendance because you can rely on your core supporters to show up year after year. Don’t get me wrong, making space for those returning patrons is extremely important. We will be the first to stress the importance of donor stewardship. But, if you’re only attracting people who are within your organization’s immediate following to your events, then what’s the point?
So how do you get people who aren’t already on your email list, don’t follow you on social media, and probably have little to no idea what your organization is doing to show up to your event? There are tons of tools you can use: press releases, paid radio/TV/print/social media/web ads, posters, mailers, the list goes on. I’m here to de-mystify one of my favorite FREE tools for marketing events: Facebook’s Event feature.
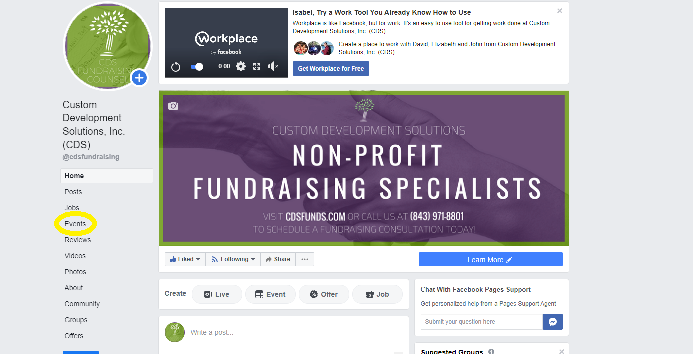
- Start by heading to your organization’s page. On the left-hand side, you’ll see a few tab options. Select “Events” (see below).

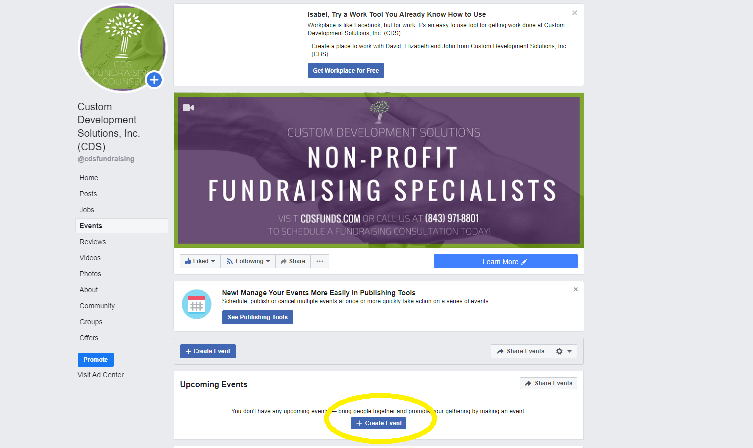
- Once you’ve created an event, this is where all of your great content will appear. For now, click the “Create an Event” button. A dialogue box with fields for information about your event will appear.

- Event name, description, and category. Now comes the copy. Chances are, you already have all the info you’ll need either on your website or in a recent email newsletter, so start there.
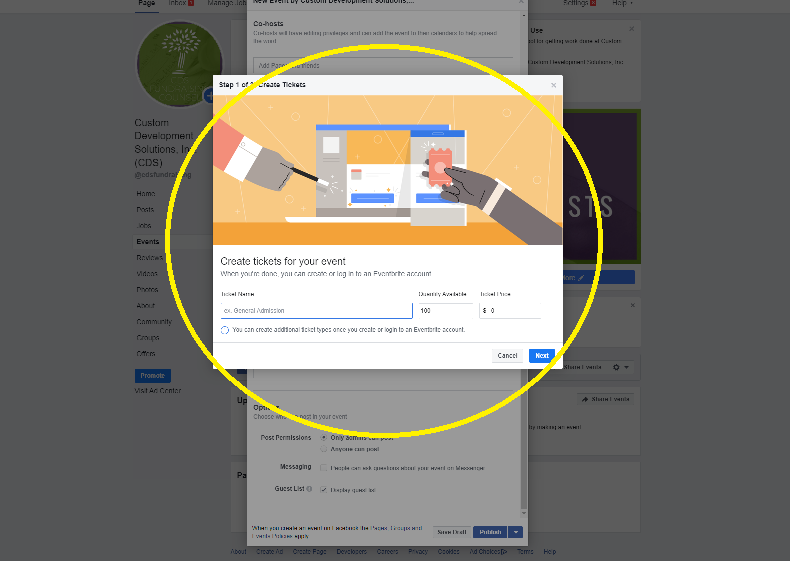
- Be detailed with that description. Who else will be there? When is the event? If it’s outside, what happens if it rains? Can I bring my dog? Do you need to purchase tickets? If so, make sure you either have on online ticket purchase platform already set up OR other instructions to share with people about where they can get tickets. Good news for you – Facebook now has a FREE tool for you to create free or paid tickets built into the event builder. That comes a bit later in the “Admission” section. Here’s an image of what the ticket tool looks like:

- Select the most relevant category. Remember: this is a search tool some people will use to look for fun things to do in their community. You want to appear there!
- Frequency. If your event occurs over more than one day/more than one time, include all of that information here. Cool feature: Facebook will remind people who mark themselves as “interested” or “going” to your event as it approaches. Want to add this event on a recurring basis? You can do that in the Details section under “schedule”.
- Co-hosts. Are you hosting the event at some one else’s venue? It’s a good idea to add that person as a co-host. That gives people an idea of where to direct questions, can be another reminder of location, and can give you a legitimacy boost.
- Details. Now’s your chance to indicate that your event happens on a recurring basis. See “schedule” option. Be sure to add keywords! As with the “category” section, people will find your event by keyword searches. These can be tricky because you can’t type in whatever keywords come to mind; Facebook has a set list. Hosting an oyster roast in Charleston in December? Keywords might be “food festival” and “Christmas”.
- Options. These may differ based on your event/support staff, but generally I would suggest the following for your options:
- Post Permissions. Always allow that “anyone can post”. This is an easy platform for engagement and to show people who are checking out your event that others are interested in it. It’s also a great place for FAQ’s! People may see a question they have is already answered by a post on your event page. On the flip-side, not allowing public posts can discourage interest if people have questions and can’t ask them easily.
- Messaging. Check the box that allows people to ask questions via messenger, for the same reasons. Not having an easy place to answer questions can diffuse interest in your event quickly.
- Guest list. Display that guest list! This allows people to see how popular an event is and whether they have any friends going.
- Create Event!
Share your event. Once you’ve created your event, there’s still a bit of work to be done. You should immediately invite anyone and everyone on Facebook who may be interested in your event to start beefing up that guest list we talked about earlier. The new event will automatically share to your organization’s timeline; share it to your personal page and ask other staff members to do the same. You’ll also want to link any copy on your website or in emails back to that Facebook page to maximize traffic.
Stay top of mind. Post photos, FAQ information, and any changes to event details (after updating them in the event settings) on your event timeline. The purpose of these photos is to build excitement. Photo ideas: raffle/prize info if your event has one, pictures from last year’s event and behind the scenes preparation pictures. People marked as “interested”/“going” will receive a notification when you post, which is a natural way to remind them about your event AND to reinforce your brand. Extra points if you can get co-hosts or other staff to post relevant info as well.
Use those insights. Once you’ve started building a guest list and have a few posts on your event timeline, start mining your insights tool. To view them, go to your organization page and click “insights” in the toolbar at the top of the page. Then click “events” in the toolbar that appears to the left.
Disclaimer– as I heard Rachel Clemens from Whole Whale say on a webinar, “Organic reach ain’t what it was.” Paid promotion of your social content is becoming a more and more crucial component of online visibility. Our friends at Whole Whale say you can do it with just $100. Want to learn how? Check out their “Social Media for Social Impact” course here.